Beginner's Guide to Contributing on Github
2020-05-25

Open source is a term used to describe software where the source code is publicly available. Open source software has many advantages over programs where the source code is hidden to the public. One is that anyone can implement features or fixes. This helps the program adapt to the needs of its users, since the users often the one designing new features. It also is a great introduction to team based software development.
Open source projects use a variety of tools to assist in collaborative development. The most common of these are git and GitHub. This document will go over the basics of using these tools to contribute to an open source project.
These instructions assume you have no prior knowledge of git or GitHub and only the most basic understanding of the terminal or command line. The actual programming of a new feature or fix will not be covered since every induvial project is unique.
Getting Started
-
Sign up for a GitHub account. This can be done by going to http://github/join.
-
Once you finish registering, be sure to confirm your email before continuing
-
Install git. Git is the tool used by all GitHub projects to allow developers to collaboratively contribute to a project. To contribute you will need to have it installed.
macOS
Most macs already have git installed. If you cannot proceed at step 5, you can come back to this step and install it from git-scm.com. Once downloaded, run the installer.
Windows
Go to git-scm.com and download the installer. Run the installer and keep all the default settings.
-
Open a terminal window. Git is not a normal GUI program, so it does not have any graphical interface. Instead, git is used from the command line. Windows users will have Git Bash installed on their system from step 3, which can be accessed by typing "git bash" into the search box on windows. Mac users can access the terminal by bringing up spotlight with CMD+Space, and typing "terminal" into the search
-
Confirm your git installation by running
git --versionin the terminal. It should print out a version number like:git version 2.21.0.windows.1If this appears, you have successfully installed git.
Note: all
monospace fontdenotes a command entered into the terminal, or the terminal's response to a command. -
Go to the GitHub page for the project you are trying to contribute to. This is known as a repository. This tutorial will use microsoft/vscode as an example. On the main GitHub page for this project is the code, as well as a readme file, which will explain the project. In the folder view, there should be a file called CONTRIBUTING.md, click to open it

-
This file details how the project owners want someone to contribute to their project. For large projects, there are often rules all contributors must follow, otherwise their changes will be ignored. Be sure to follow each individual repositories rules. After reading the document, go back to the main repository page in your browser.
Getting a personal copy
-
Fork the project. In order to modify a project on GitHub, you must be authorized by the owner. This means that any person on the internet cannot modify the code without permission. As someone who isn't authorized, you cannot edit the repository directly. Instead, you must fork the repository. A fork is a identical copy of the project at this point in time. By forking the project, you will get your own personal copy which you can modify. To fork a repo, click the fork button in the top right.
-
Once the fork is made, GitHub will redirect to it. The repository should be identical, but with your username instead of the original authors. In our example, the repository is now your-username/vscode. It should also have the name of the original project underneath it, which shows that this project is a fork, and knows it was originally from Microsoft. If you do not see your fork, manually go to GitHub.com/your-username/project_name to see it.
-
Clone our fork. In order to make our change, you need to download the code to our computer. In git, this is called cloning. Clone your fork by going to the green button on the right that says "clone or download". This will reveal a link. Copy it. Then go to our terminal and type
git cloneand then paste the link in. It should look like this:git clone https://GitHub.com/your-username/vscode.gitHit enter to begin downloading the code to our system. It will install into a folder called vscode.
-
Explore the new repository by using
cd vscodeto navigate into the newly created folder. It should look identical to the files in step 6, but there is a hidden difference. Git knows that this folder is a copy of our version of the project on GitHub.com.To see this, run
git remote -v. This command shows what this repo knows about versions of itself that exists elsewhere. It should output:origin https://GitHub.com/your-username/telemetry.git (fetch) origin https://GitHub.com/your-username/telemetry.git (push)Notice that git understands this project came from the fork made earlier. Git has automatically named our fork origin. What git does not know is that our fork itself came from Microsoft's official repository. Lets fix that.
-
Add our upstream remote. You now want to tell git about the official project at microsoft/vscode. To do this, add another remote. By convention, this remote is called upstream. To add the remote, run
git remote add upstream https://GitHub.com/microsoft/vscode.gitNote that this URL is the official version, not our fork. To get this URL, click the "Clone or download" button on the official repository on GitHub.com, just like step 3
Now you have a local copy of the code, that is aware of both your fork and the official version on GitHub. However, don't modify the project yet.
Making a change
-
Type
git status. Git will return information about this git repository.On branch master Your branch is up to date with 'origin/master'. nothing to commit, working tree cleanThis message states that our local copy of the project is identical to the version on GitHub. It also says git is on the master branch. Branches are gits abstraction for showing version of a project. The master branch holds the "official" history. This means that it will reflect what Microsoft version of VSCode should look like, and should not be modified. Instead, its recommended create a branch to segment our changes. Think of a name for the branch that describes the desired change. Our example will use my-feature. Then use the following commands
git branch my-feature git checkout my-featureThe first command creates the branch, the second updates our local repository to switch to it.
-
Now the local repository is on the my-feature branch. Because it is based on master, there is no differences yet. However you can confirm you are on a new branch by using
git status. This will print a message like:On branch my-feature nothing to commit, working tree clean -
It is now time to make your contribution to the code by editing the files on disk as if you were programming normally. Obviously this step will vary greatly, but as an example, these instructions will modify the README.md file as an example. Your changes don't have to be completed before the next step, but you cannot continue without making at least one change to a file.
Once you have modified some files, git can detect the exact changes made. This is visible by running
git status.On branch my-feature Changes not staged for commit: (use "git add <file>..." to update what will be committed) (use "git checkout -- <file>..." to discard changes in working directory) modified: README.md no changes added to commit (use "git add" and/or "git commit -a")The
statuscommand will be helpful in the next few steps to better understand what git is doing behind the scenes. The command does not change anything about the repository, so feel free to run it whenever. -
Once changes are made on disk, git has to be told to track each modified file. Do this with the
addcommand. You can specify the specific files to add, or use-Ato add all changed filegit add -AGit will track these files. This can be seen by running
git status.Changes to be committed: (use "git reset HEAD <file>..." to unstage) modified: README.md -
Commit changes. The core of git is commits. These can be thought of as incremental saves to your repo. Each describes what changed on the disk since the last time commit was run. Commits only commit changes that have been added. To commit added changes, you need to first think of a message to describe the changes. This is like naming the save, and is useful in case you need to revert back to it. To commit, run
git commit -m "describe your changes in a message inside the quotes"Committing will instantly take all added changes and save them inside git. Again, nothing appears to happen, but now running git status will show that there are once again no unsaved changes, as all the changes are now saved in the commit.
-
Pushing your code to GitHub. The change is complete, but currently it only exists on your machine. To share the change, it must be put back on GitHub. This is done by pushing the changes back to GitHub. Pushing only puts commits back on GitHub, so any changes after commit will not be applied. To push your commit, and therefore change, run
git push.Note: If git gives an error message about not knowing where to push, it simply needs to be told to make a new branch on GitHub to match our new local branch. To do this run
git push -u origin my-featureThis will copy your local changes up to your fork on GitHub
-
Repeat steps 2 through 6 as many times as it takes to complete the changes you want to make. Remember that a commit saves your changes to your local repository, and a push copies those changes to your fork on GitHub.
Getting your change added to the project
-
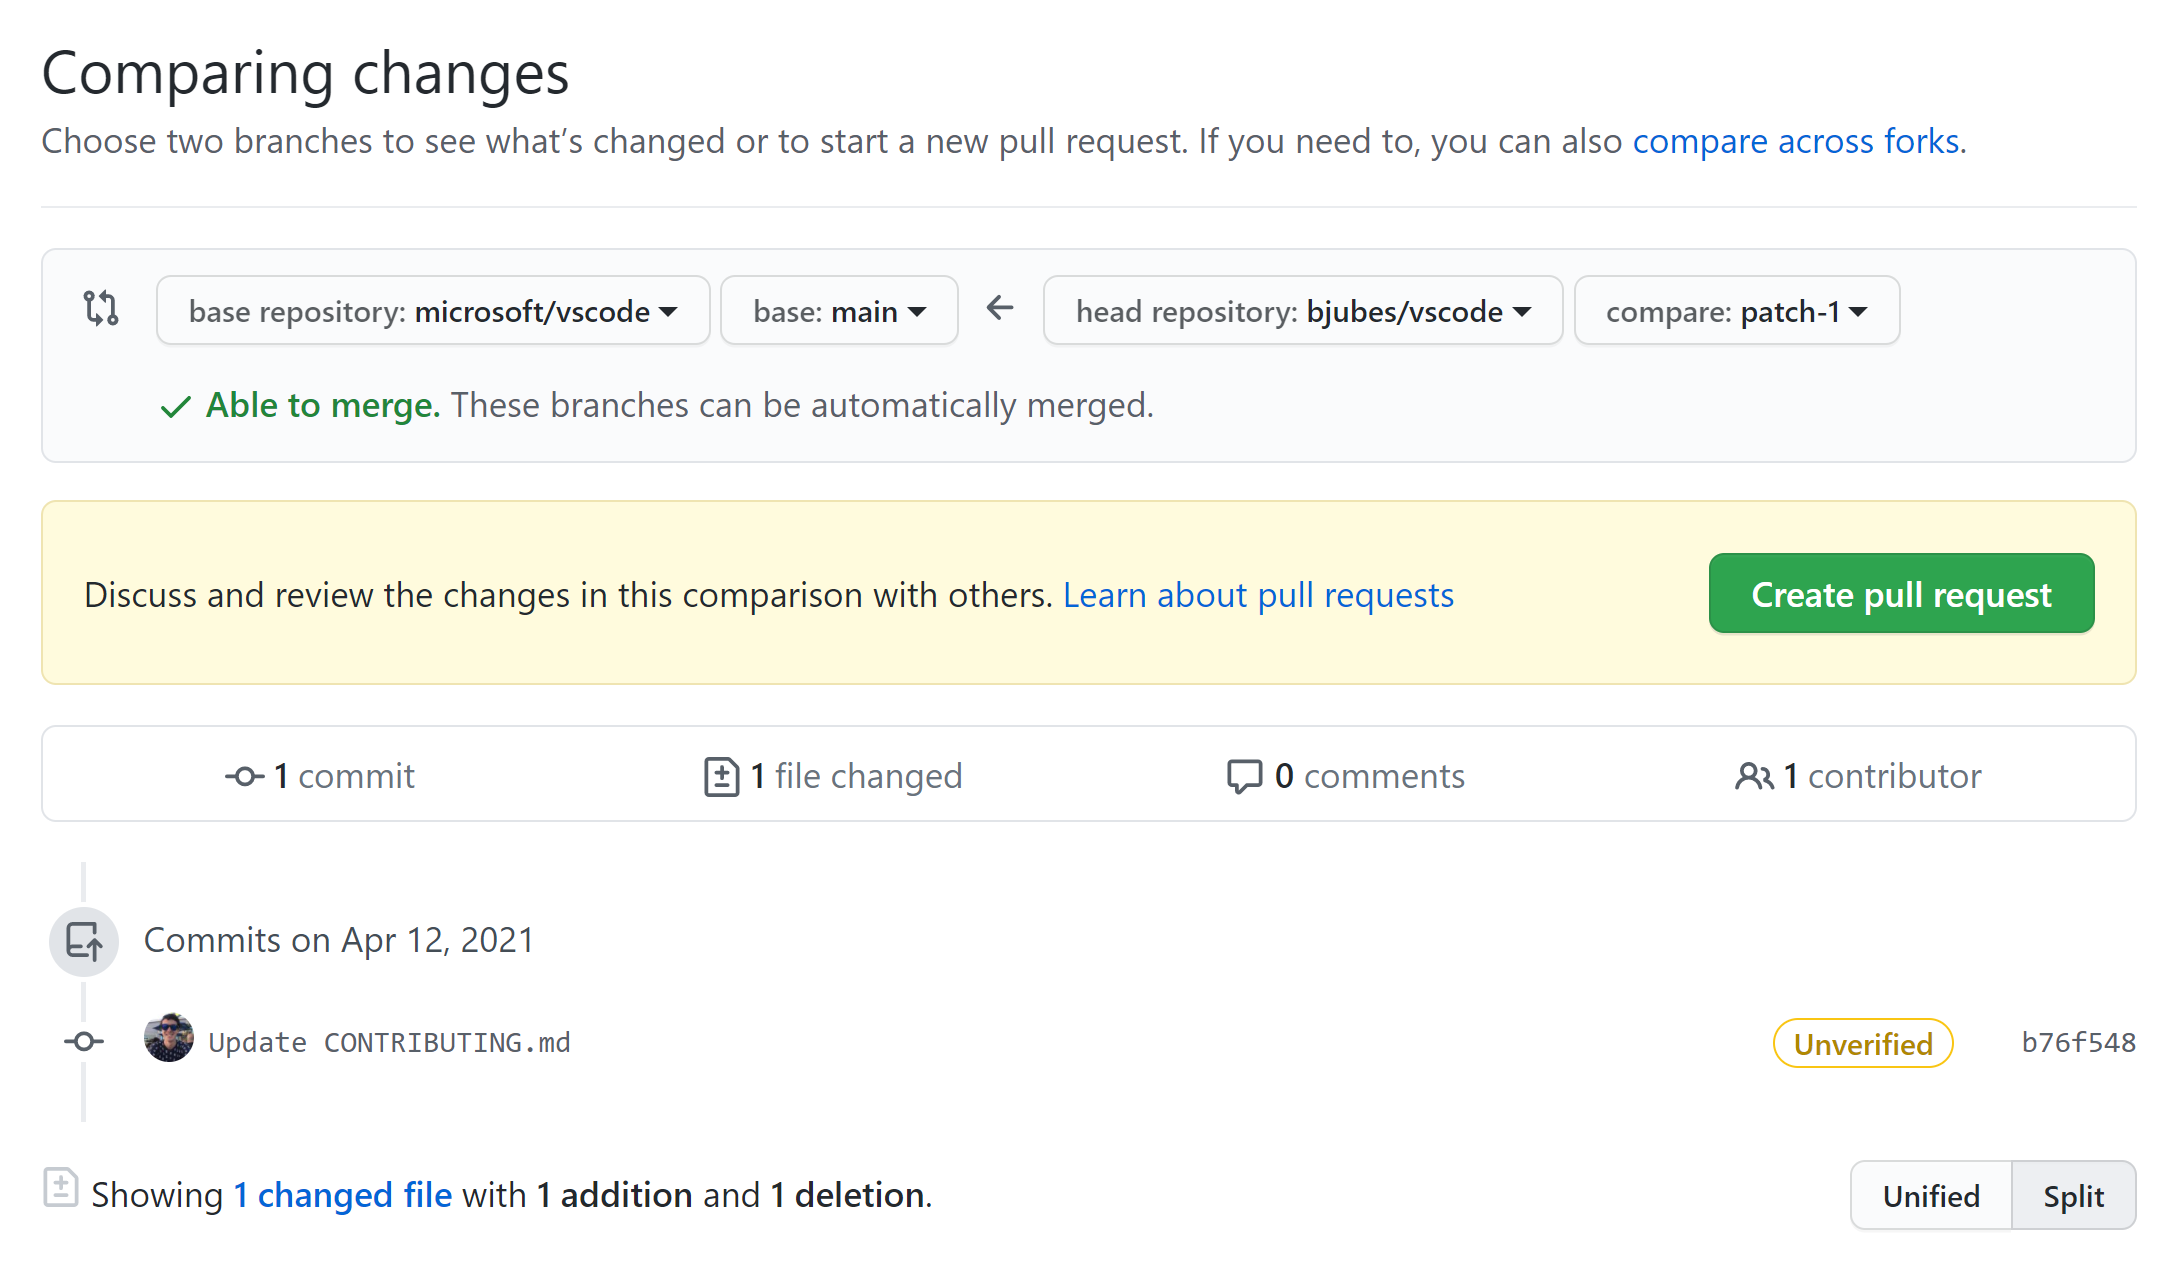
Now that the changes are on the fork, its time to request that the maintainers of the project add them to the official version. Go to the original repo on GitHub (in this case microsoft/vscode). A green bar will appear with "create a pull request" button on the right. Click it.
-
You will be taken to the Pull Request dialog. A Pull Request is how you ask that the owner put your changes into the repository. The request has a title and body you can fill out to describe your changes, and shows what files you changed and how. Be sure to fill it out following the specific instructions of that repository.
-
Ensure the request references the correct branches. At the top of the pull request, you will see text that says:
your-username wants to merge 1 commit into master from your-username/my-feature"
This means the pull request is linked to the branch on your fork, and that you are asking it to be put into the master (or main) branch of the official project. If the branches are wrong, you can click them to change them.
When you are done, hit the "create Pull Request" button at the bottom of the screen.
-
Ensure the automated checks pass. For most repositories, there are a bunch of checks done automatically on any potential change. These will appear as green dots when they start, and turn into checks or x's based on whether they pass. Stick around or come back in a few minutes to ensure all relevant checks pass on your code. If any fail, read what they are checking for, and make sure your change is compliant.
-
Wait for and respond to maintainer's requests. Maintainers are the users who are authorized to accept a pull request and change the official project. Often they will ask you to revise your changes before they accept your contribution. If you need to change your code, you simply have to repeat steps 2 through 6 in the Making a Change section. The pull request links to your branch, not your specific changes, so every time you push the pull request will reflect those changes automatically.
Maintainers will often ask that you "merge in master" to your changes. This refers to the problem that your branch reflects the original project at the time you ran the branch command. If you needed to make multiple changes, often your code now reflects an old version of the repository. The next section instructs how to do this.
Updating your branch
-
To get new changes into your branch, you first must get those changes from the official repo into your fork. These changes are on the master branch of the official repo, so first change to the master branch of your fork by running:
git checkout master -
Now you need to copy the commits on the official repo's master branch to your local machine. To do this run:
git pullYou will see a lot of output as your files are updated to mirror the most recent version of the repository.
-
Go back to your feature branch using
git checkout my-feature -
Merge the updated master into my-feature by running
git merge masterNote this command takes the updates in master, and copies them to the branch you are currently in, in this case my-feature.
-
Now that your branch is up to date, push it to GitHub so the pull request is updated.
git pushYour pull request will now reflect changing the latest version of the official repository.
Contributing to open source is a great way to give back to software that you have used. By contributing to open source, you benefit every user of that program and are able to help shape the features and goals of a project. By using these instructions, you can begin to give back to nearly every popular free software project.